Email Client Setup: Outlook 2013
How to set up your email with Outlook 2013
- Step by Step Walkthrough (POP)
- Step by Step Walkthrough (IMAP)
- Email Client Setup: Comparing POP vs. IMAP
 Steps 6 & 7 |
 Steps 8 & 9 |
 Steps 10 & 11 |
 Steps 12, 13, 14 |
 Steps 15, 16, 17 |
Step by Step Walkthrough (POP)
You will need your incoming mail server, outgoing mail server, full email address, and your email password. The default settings are listed below.
- Open Outlook 2013.
- Click File.
- Click Info.
- Click Add Account.
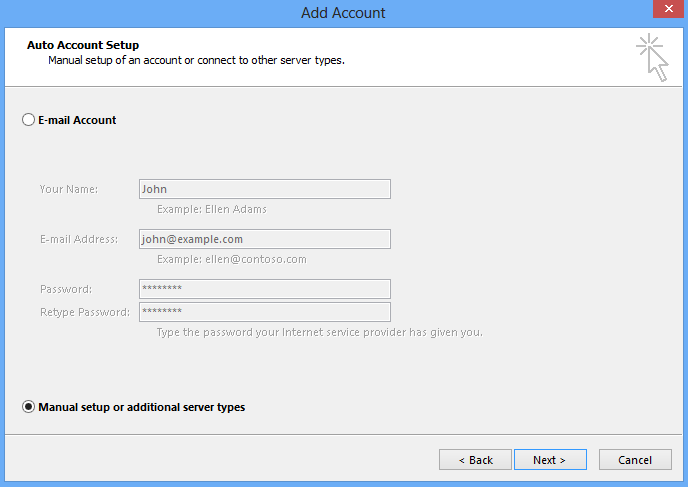
- Choose Manual setup or additional server types.
- Click Next.
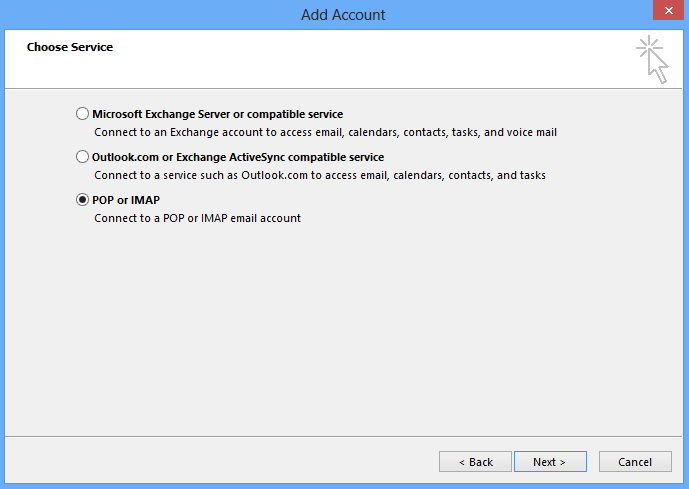
- Choose POP.
- Click Next.
- Fill in the following information:
- Your Name: The name to display on your email.
- Email Address: Your full email address
- Account Type: POP
- Incoming Mail Server: pop.virtualave.net
- Outgoing Mail Server (SMTP): smtp.virtualave.net
- User Name: Your full email address
- Password: Your emailpassword
- Remember Password: We recommend having this checked.
- Require logon using Secure Password Authentication (SPA): We recommend having this unchecked.
- Click More Settings.
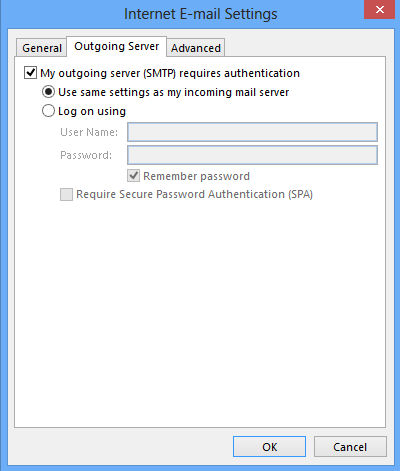
- Click Outgoing Server.
- Check My outgoing server (SMTP) requires authentication.
- Select Use the same settings as my incoming mail server.
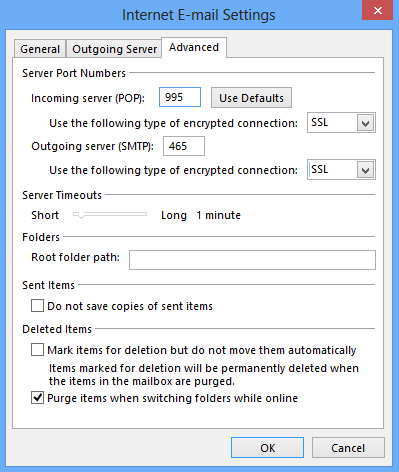
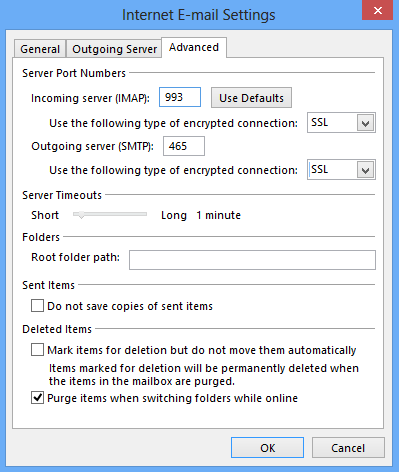
- Click Advanced.
- Fill in the following information:
- Incoming Server (POP Port): 110
- Use the following type of encrypted connection (Incoming): Optional. If enabled, change Incoming Server (POP Port) to 995.
- Outgoing Server (SMTP Port): 587
- Use the following type of encrypted connection (Outgoing): Optional. If enabled, change Outgoing Server (SMTP Port) to 465.
- Click OK.
- Click Next.
- Click Finish to complete the set-up.
Step by Step Walkthrough (IMAP)
 Steps 6 & 7 |
 Steps 8 & 9 |
 Steps 10 & 11 |
 Steps 12, 13, 14 |
 Steps 15, 16, 17 |
You will need your incoming mail server, outgoing mail server, full email address, and your email password. The default settings are listed below.
- Open Outlook 2013.
- Click File.
- Click Info.
- Click Add Account.
- Choose Manual setup or additional server types.
- Click Next.
- Choose IMAP.
- Click Next.
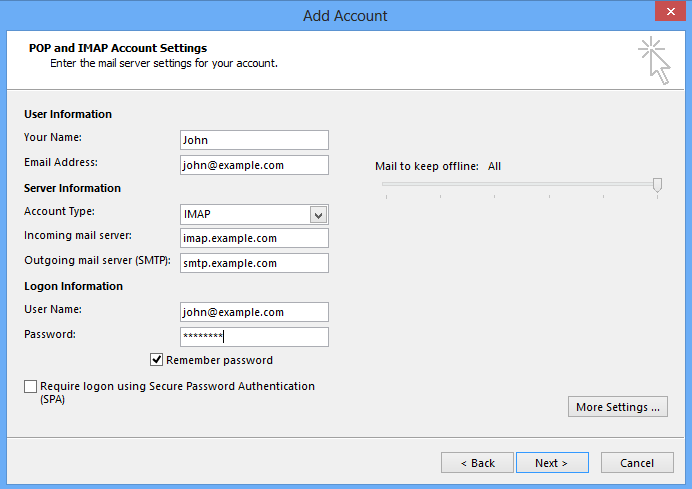
- Fill in the following information:
- Your Name: The name to display on your email.
- Email Address: Your full mailbox address
- Account Type: IMAP
- Incoming Mail Server: imap.virtualave.net
- Outgoing Mail Server (SMTP): smtp.virtualave.net
- User Name: Your full email address
- Password: Your email password
- Remember Password: We recommend having this checked.
- Require logon using Secure Password Authentication (SPA): We recommend having this unchecked.
- Click More Settings.
- Click Outgoing Server.
- Check My outgoing server (SMTP) requires authentication.
- Select Use the same settings as my incoming mail server.
- Click Advanced.
- Fill in the following information:
- Incoming Server (IMAP Port): 143
- Use the following type of encrypted connection (Incoming): Optional. If enabled, change Incoming Server (IMAP Port) to 993.
- Outgoing Server (SMTP Port): 587
- Use the following type of encrypted connection (Outgoing): Optional. If enabled, change Outgoing Server (SMTP Port) to 465.
- Click OK.
- Click Next.
- Click Finish to complete the set-up.
- Refer to the generic troubleshooting steps for email client setup.
- Consult Microsoft's support page for Outlook 2013.
- Contact us so that we can help you troubleshoot the issue.
Using a different Outlook version?
- Email Client Setup: Outlook 2016 and Microsoft 365
- Email Client Setup: Outlook 2010
- Email Client Setup: Outlook 2007
- Email Client Setup: Outlook 2003
- Email Client Setup: Outlook for Android